
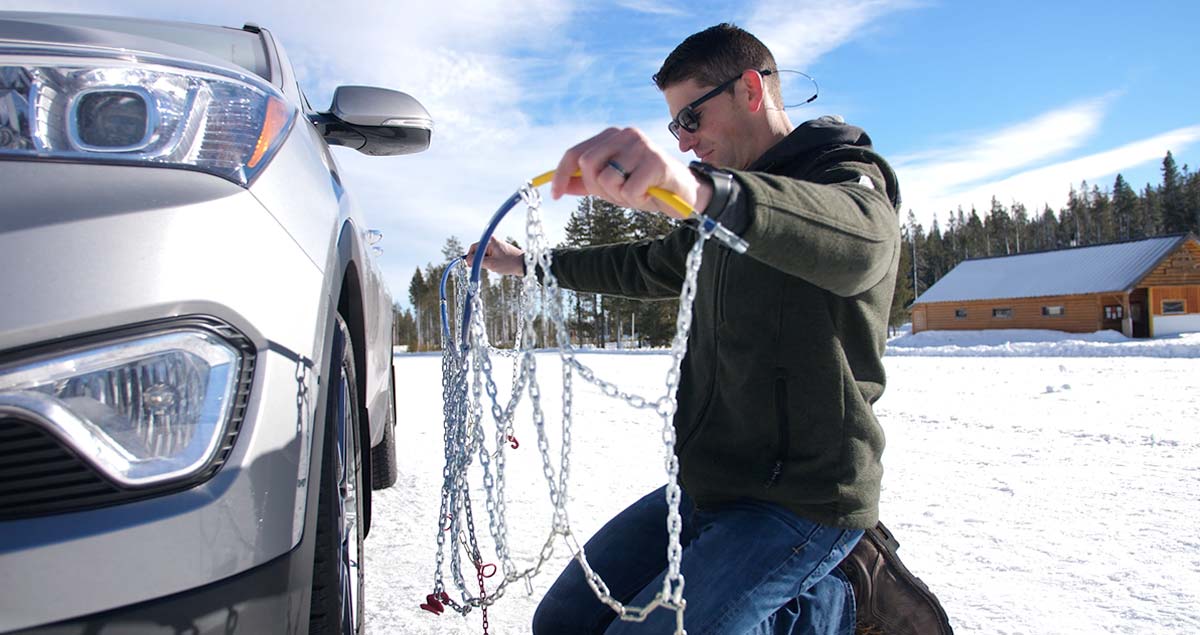
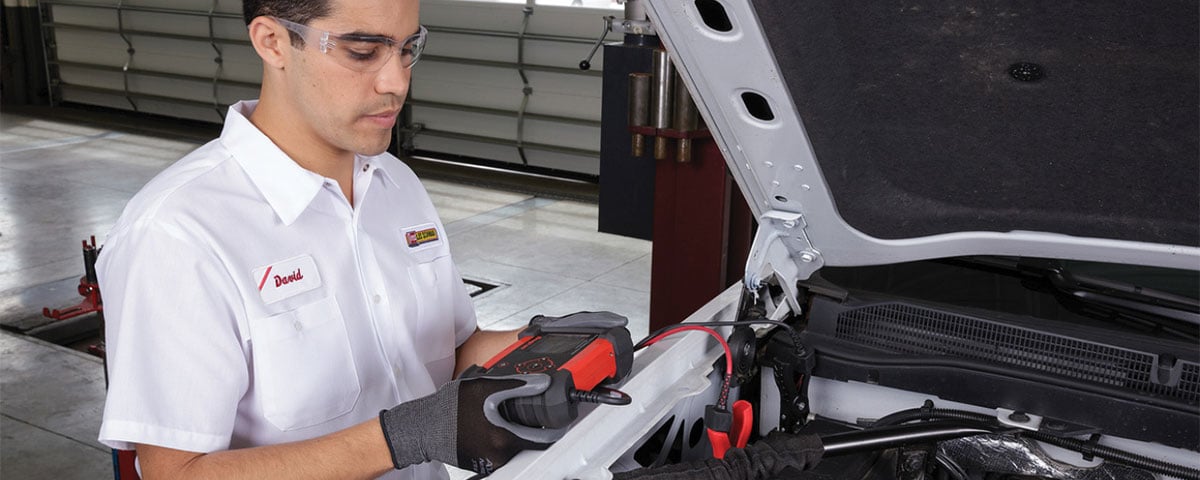
Get a Grip on Winter Tire Chains
Snow-covered roads have been an issue for drivers since the invention of the automobile. Back then, people would lash rope or vines around their tires for added traction on snow-covered and icy roads. Or they’d just hitch a sled to a team of horses and skip the car altogether.
Thanks to the creation of tire chains in 1904, the world has seen some innovative and effective ways of increasing traction on winter roads, including cable chains, link-fit chains, quick-fit chains, and tire sock traction devices.
Nothing Beats Tire Chains
Do a quick search for winter traction devices and you’ll come across some interesting alternatives to tire chains. Those include oversized zip ties that lock in place over the outside of your tire by looping through the inside of the wheel.
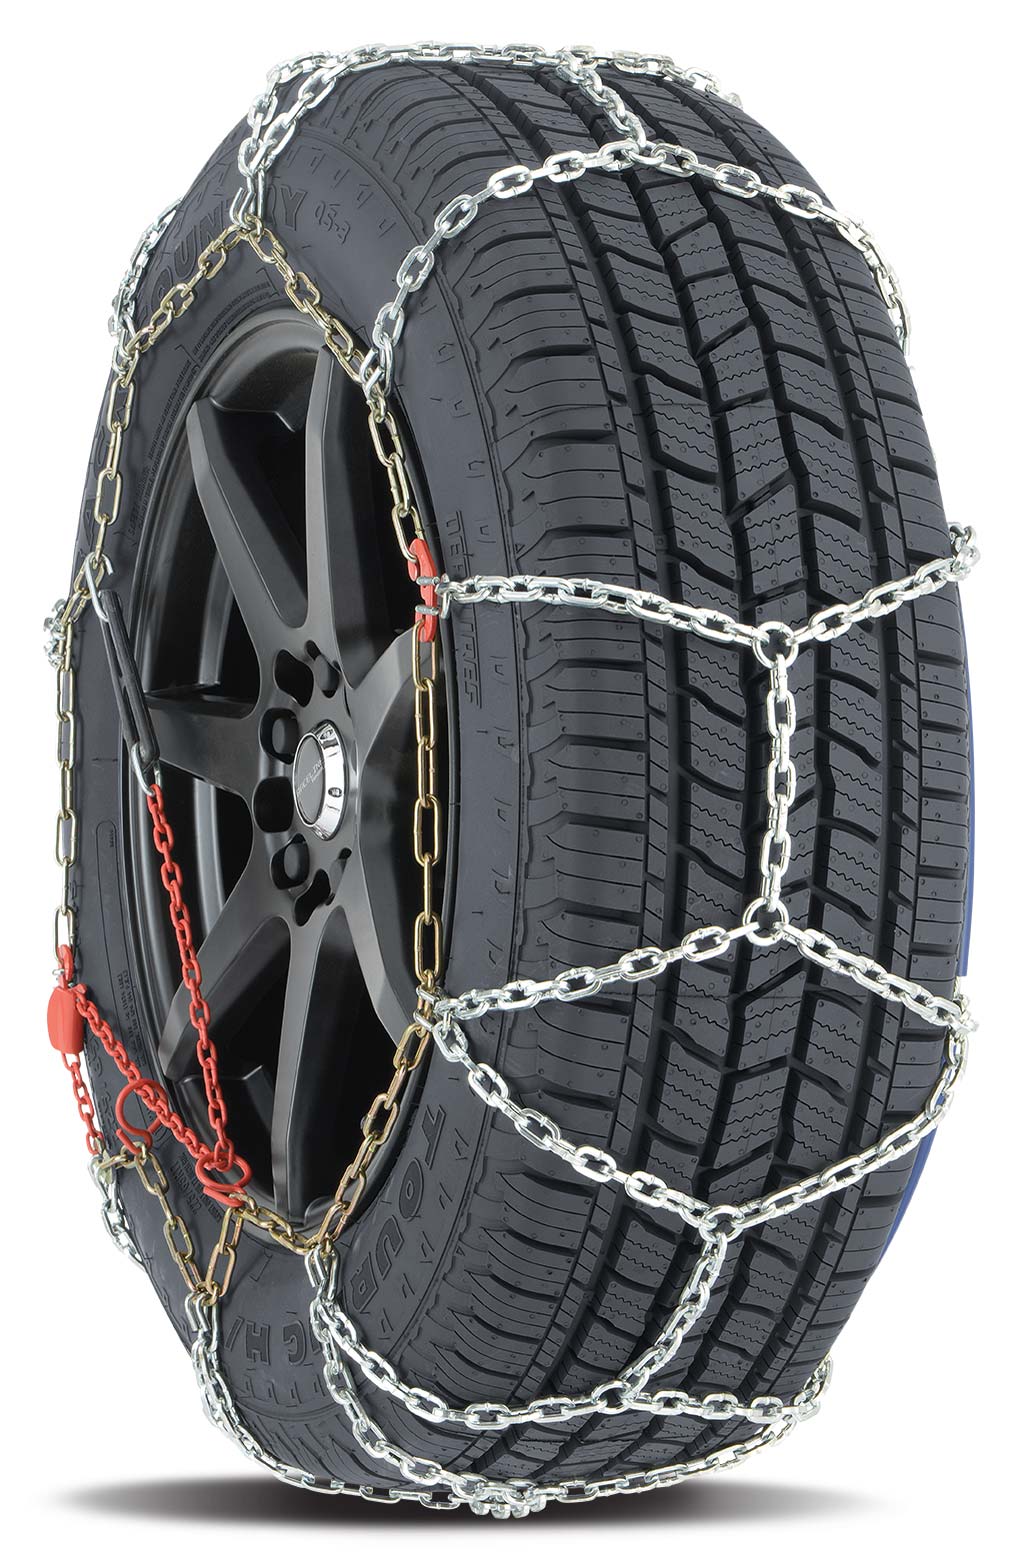
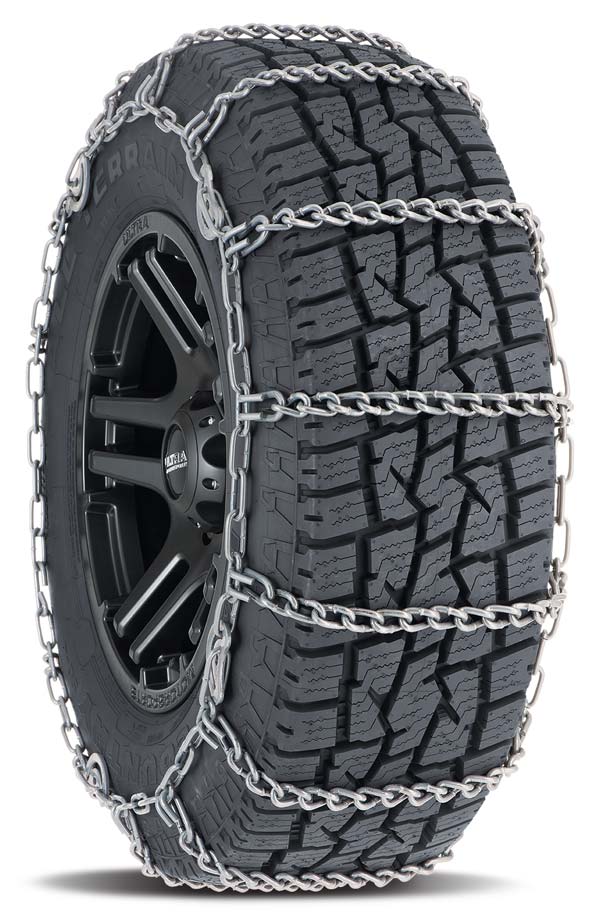
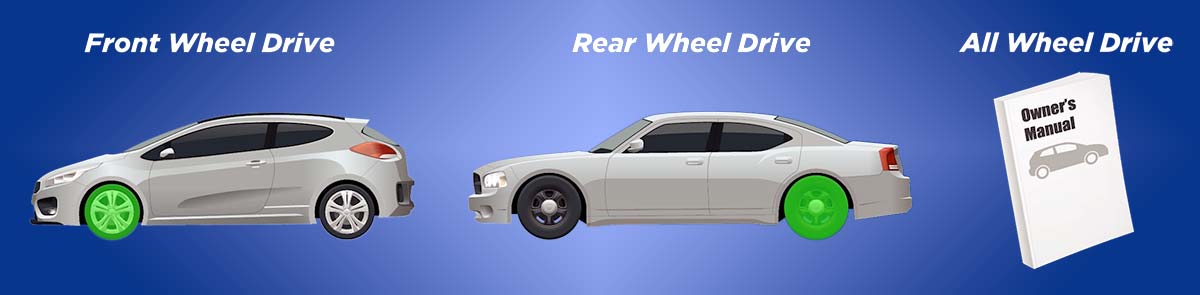
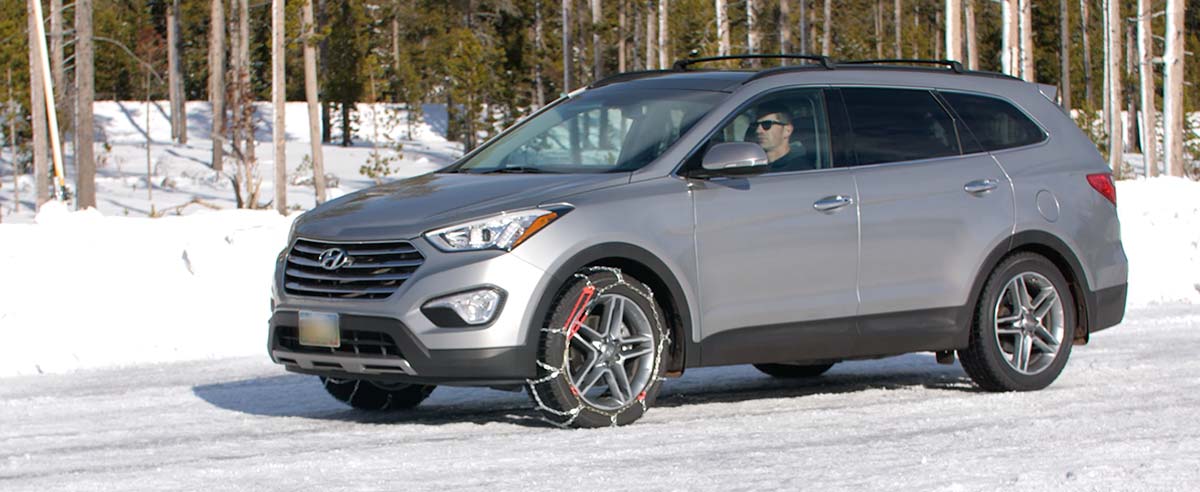
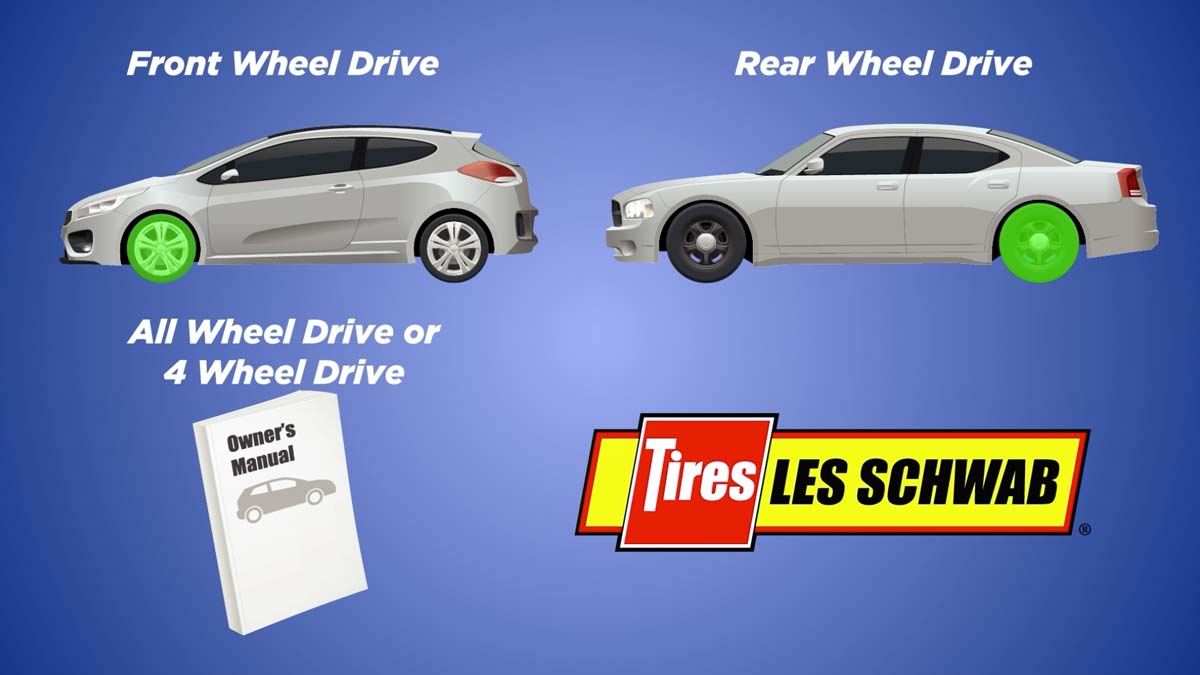
Of those many options, not many can beat a set of cable chains, link-fit chains or today’s cable-and-latch quick-fit snow chains that bite into deep snow and offer improved tire traction on icy roads. These chains are installed to the drive wheels of your vehicle. If you have front-wheel drive, the chains go on the front. Rear-wheel drive, the chains go on the back. Check your owner’s manual if you have an all-wheel-drive or 4-wheel-drive vehicle. Or simply ask the experts at Les Schwab for help.
Quick-fit chains, cable chains, and link-fit chains can improve traction in even the harshest winter conditions, but you do need to drive slow, avoid spinning your tires, and take them off once you start seeing bare pavement.
Tire Socks
Manufacturer recommended
for some vehicles.

Cable Chains
Inexpensive for those
just-in-case moments.
Quick-fit Chains
Easy to install and ideal for
the best traction on the road.
Link-fit Chains
Heavy-duty option. Some
available for off-road use.
Find a set of snow chains for your vehicle at your local Les Schwab. Learn how to install quick-fit chains.
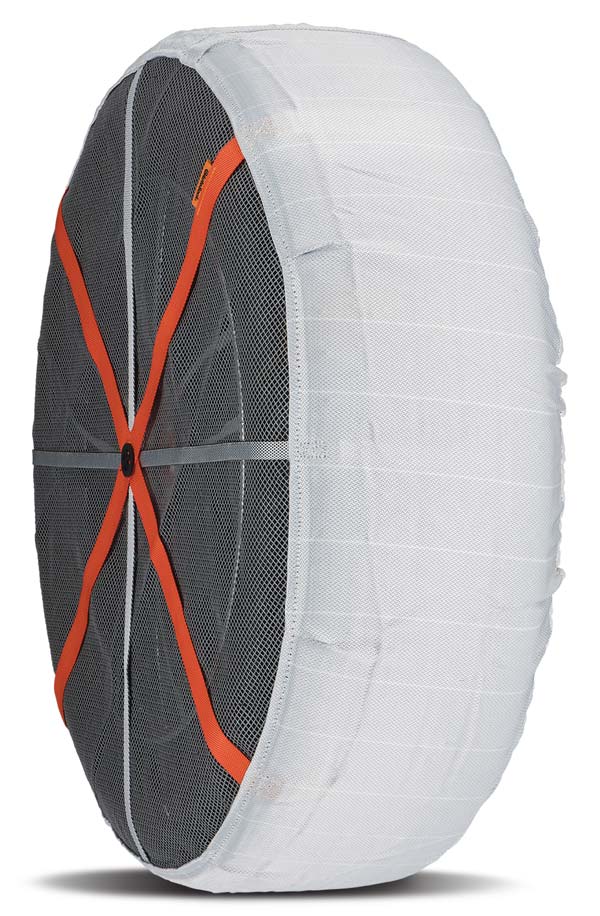
Pull on a Pair of Tire Socks
Anytime you face winter’s fury, traction quickly becomes your top priority. For today’s performance vehicles, as well as cars and trucks with limited clearance between the tire and wheel well, a set of good snow tires have always been a great option if the manufacture of your vehicle doesn’t recommend using quick-fit chains. But now, you can add tire sock traction devices to your list of options.
What are tire sock traction devices? Invented in Scandinavia, they’re like a pair of socks for your tires. They have grippy bottoms that align with the tread on your tires and pull over your whole wheel and tire set in seconds. But, unlike a set of chains, they need to be replaced once 50% of the white road-contact fabric is gone. If you drive on bare pavement at all, it won’t take long to wear them out.
Similar to chains, they are installed on the drive wheels of your vehicle. If your car, SUV or truck is front-wheel drive, the socks go on the front. Rear-wheel drive, the socks go on the back. And if you have an all-wheel drive, stop by Les Schwab and we’ll help you decide. Also similar to chains, it’s important you drive slowly and avoid spinning your wheels when they’re installed.
Find a set of tire sock traction devices at your local Les Schwab.
Return Your Unused Devices in the Spring for a Full Refund
At Les Schwab, we carry snow chains and tire socks for passenger cars, SUVs, and CUVs. If you don’t use your chains or tire socks all winter long, you can always return them in the spring for a full refund.
Get the Right Traction Devices for Your Vehicle
Stop by your local Les Schwab. Our team of pros will show you all the options and send you home with the right size and option for your vehicle.
How to: Put on Snow Chains and Drive Safely
If you travel to the mountains or snowy areas regularly, sooner or later you’re going to have to use tire chains. Start by getting the right set for your vehicle at your local Les Schwab.
Quick-fit chains are not your grandpa’s tire chains. They are MUCH simpler to put on and take off. Here are a video, step-by-step instructions, and driving safety tips for installing quick-fit tire chains on your vehicle.
Do These Two Things Before You Leave
When you need chains, driving conditions are nasty. Snow is coming down, passing traffic is spraying slush, dirty water is dripping off your wheel wells, the road is slick, and it may be dark. Don’t make this the first time you put on your chains.
Practice installing your new chains once BEFORE you travel. Take advantage of a dry garage or driveway to make sure your winter tire chains are the right size and you’re comfortable putting them on. If needed, the professionals at Les Schwab Tire Centers can help.
Put together a simple winter road trip safety kit with warm gloves, waterproof layers, and other items to make your winter driving more safe and comfortable. In the winter, always carry this emergency kit and tire chains in your vehicle.
When and How to Install Your Tire Chains
Once you’re comfortable installing your chains, you’re ready to hit the snow.
Be Safe. If you’re on the road, pull off as far as possible onto a safe shoulder. Flip on your hazard lights. Put on your waterproof layers, hat, headlamp, and gloves from your winter road trip kit.
Identify the Correct Tires. If your vehicle is front-wheel drive, the chains go on the front. If it’s rear-wheel drive, chains go on the back. If it’s all-wheel drive, please check your owner’s manual. If you’re not sure, you can ask the experts at Les Schwab for help.
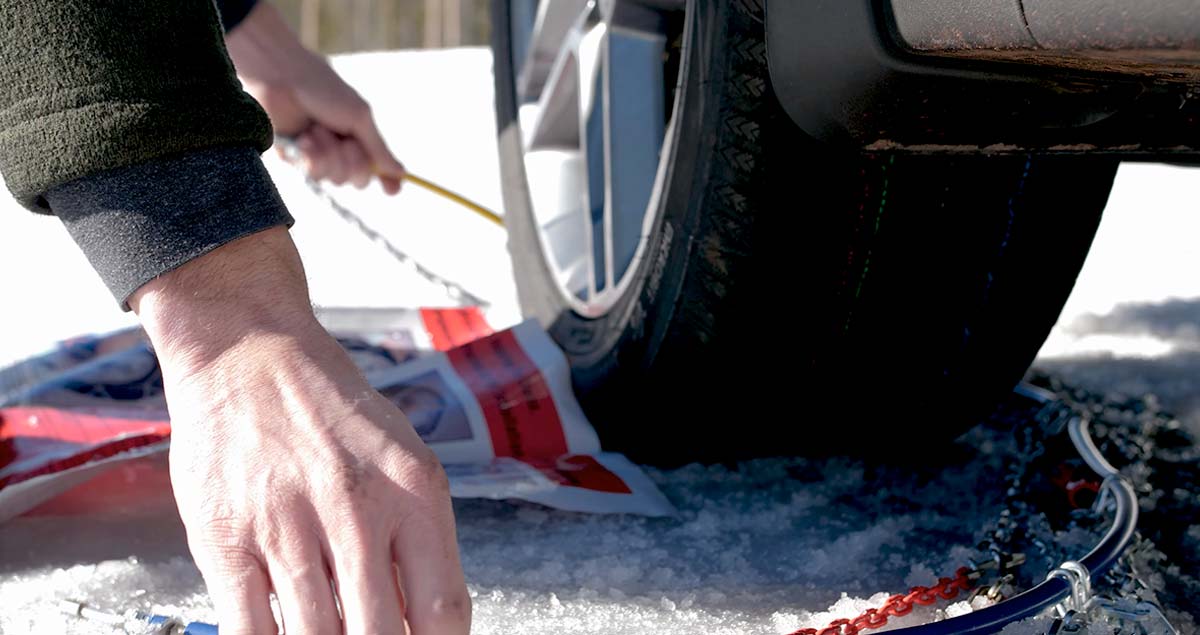
Pull Out Chains & Instructions. With your vehicle parked, open the bag and pull out your instructions and your first chain. Each bag comes with two chains. The plastic instruction mat that comes with your chains can be used as a barrier between you and the snow to keep you dry.

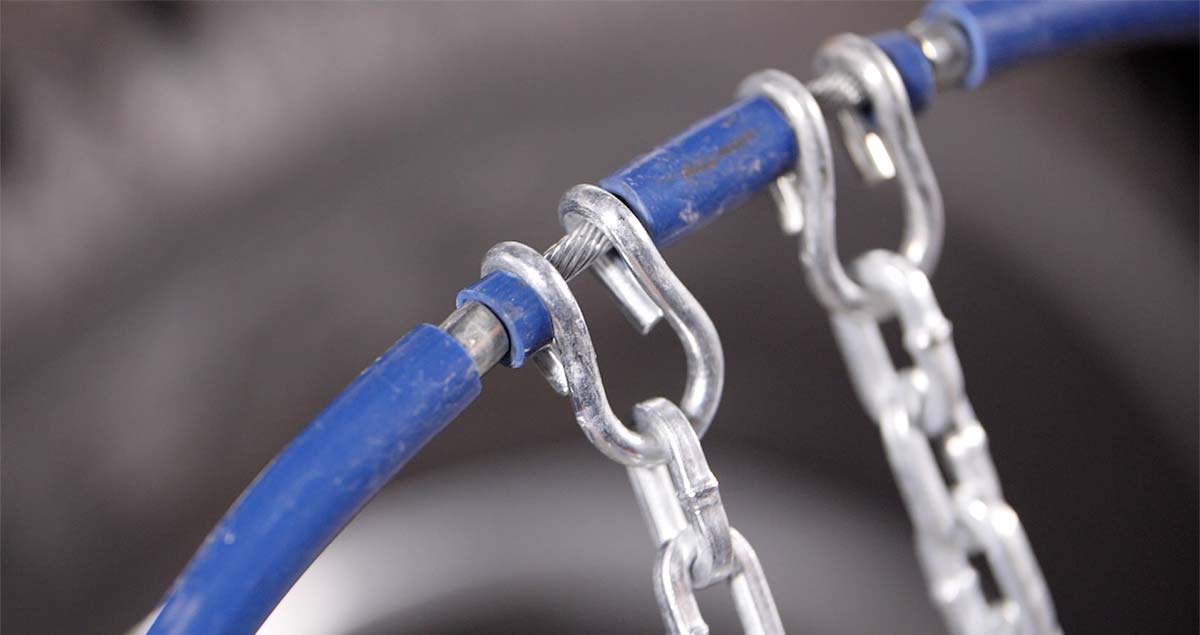
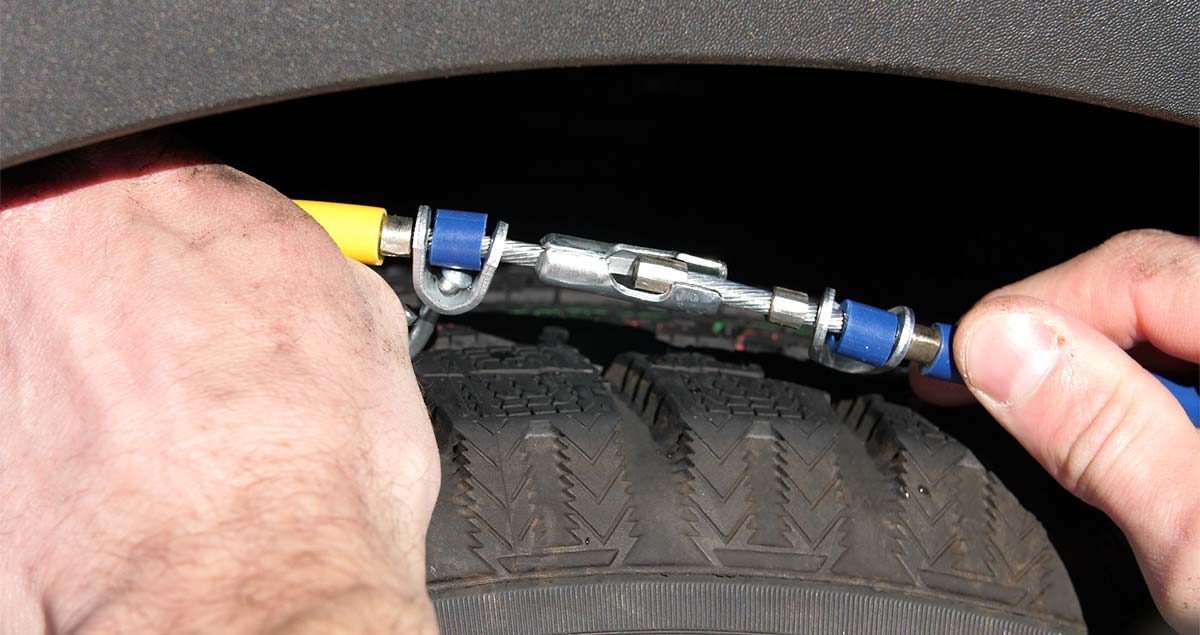
Untangle Your Chains. Holding them from the plastic-covered cable, make sure everything is straight and the chains are not looped over one another. Hold up your chains so the yellow end is in your left hand and the blue end is in your right.
The chains should hang loosely and the metal hooks seen along the yellow and blue sections should be facing away from you so they don’t damage your tires.
Place Chains onto Your Tire and Connect the Cable. Lay your chains on the ground and push them behind the tire, yellow cable end first, from the right side to the left.
Once the chains are centered behind the wheel, grab both ends and pull them up over the top of the tire. You should feel the chains against your axle.
This will allow you to easily connect the yellow and blue ends of the cable by slipping one end into the other and pulling them into place.
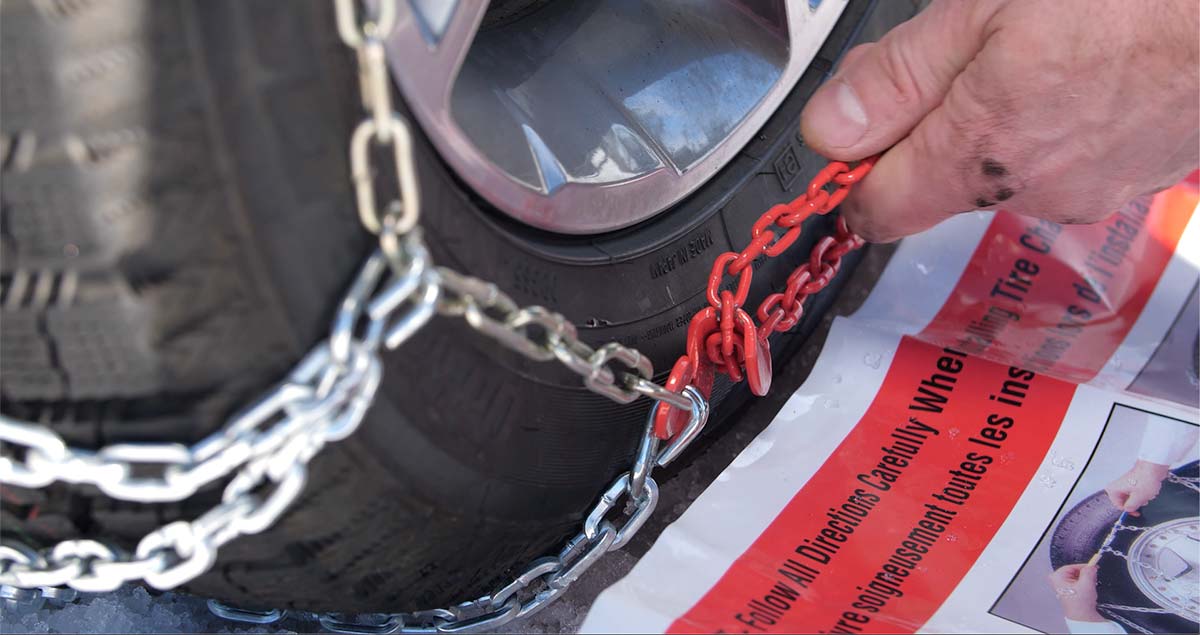
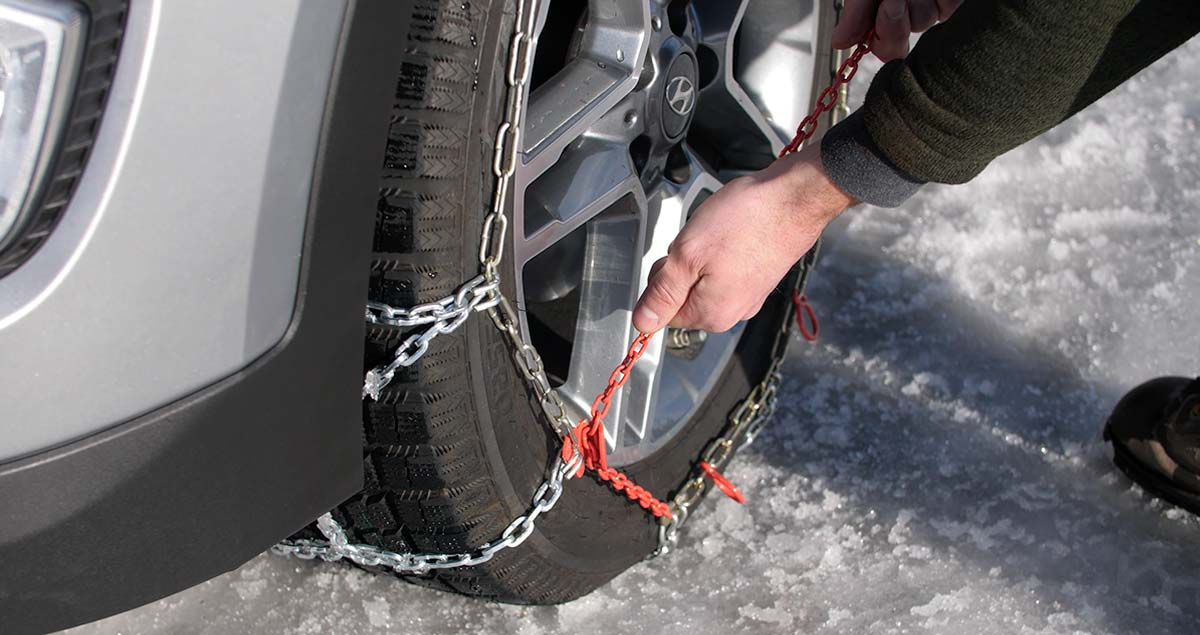
Connect the Red Hook. Now that the cable is connected on top, look for the red hook directly opposite the cable connection. Connect the red hook on the right to the first available gold link on the left.

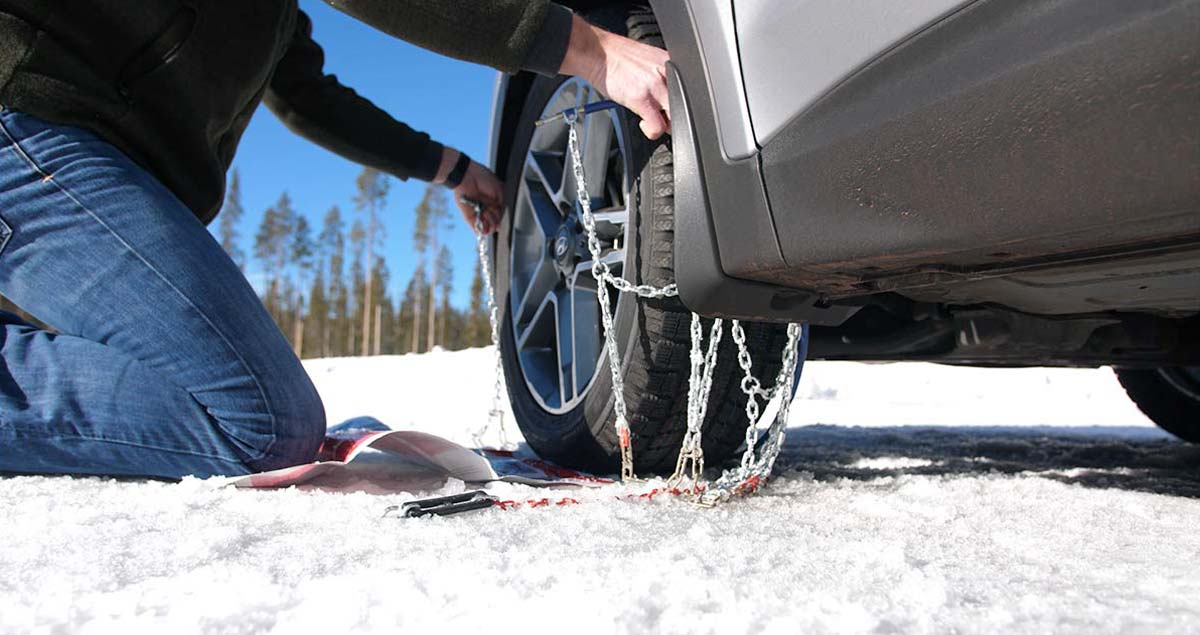
Check the Diamond Shape. Push the connected chain over the top of the tire. You should see the diamond shape in the chains against your tire. Between each of those diamonds is the center rail, which should be placed down the middle of the tire tread.
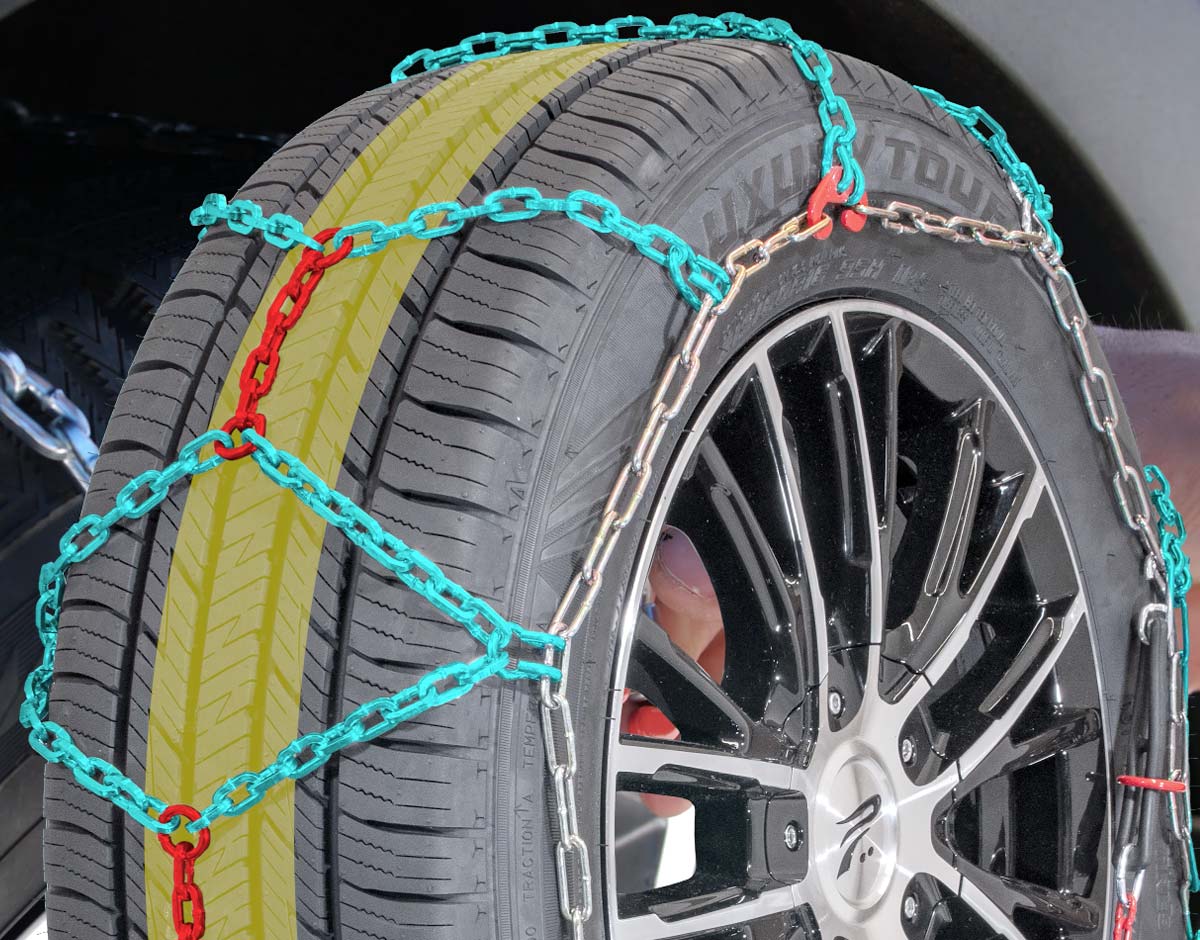
Connect the Red Chain Along the Bottom. Now that the cable is connected on top, look for the red hook directly opposite the cable connection. Connect the red hook on the right to the first available gold link on the left. Push the connected chain over the top of the tire.
The bottom of the chains includes a red draw chain with bungee on your right, and a chain guide on the left. Pull these out towards yourself.
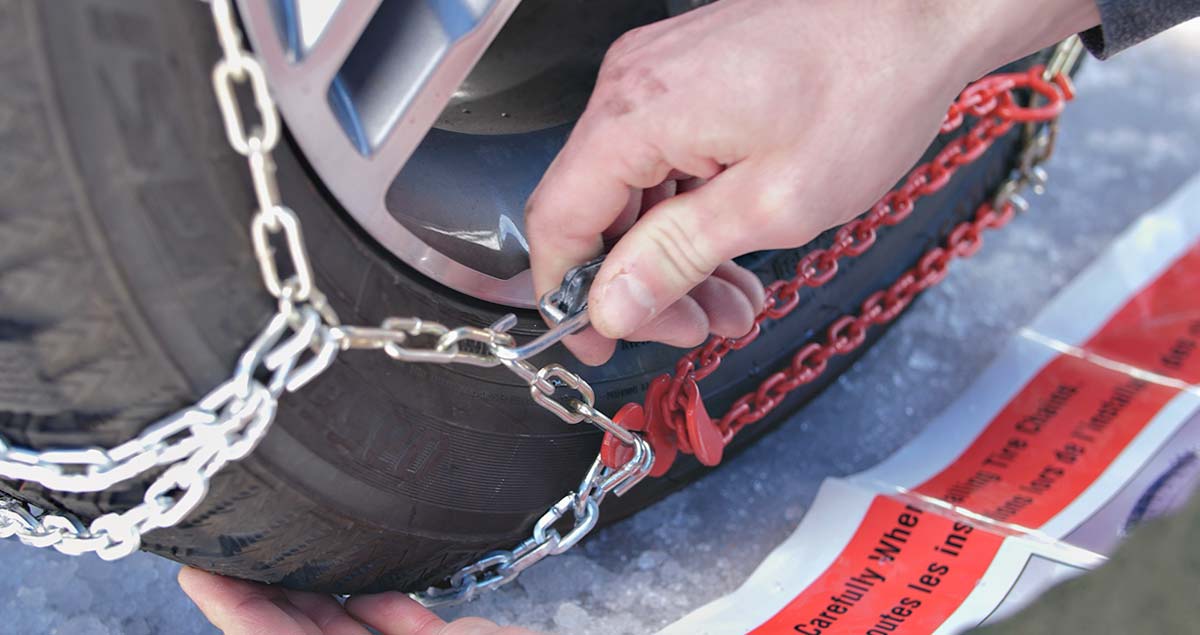
Take the long red chain and run it through the chain guide and pull as tight as you can with both hands. Don’t pull using the bungee. As you pull, one of the chain links will find its way into the notch on the red chain guide, locking it into place.
Using the bungee end of the red chain, pull it through one or both of the red loops and secure it to a gold-side chain opposite the red loops. If you can’t get it through both loops, that’s ok, pull tight through one and attach it to a side chain to the left of the loop.
Repeat on Second Tire. Repeat these steps to install chains on the other side of your vehicle.
Drive Forward Slightly. The next step is to drive forward about 15 feet, or a full car length. This gives the chains a chance to relax and settle on your tires.
Re-tighten Chains. To take up any slack, unhook the rubber end of the red draw chain and pull it tight again. Once it’s tight, guide the red chain through the loops and, again, securely latch the bungee end to the gold-side chain.
The chains should be tight on the tire. And, be sure to stop if you hear them making any contact with your vehicle. If your chains are still loose, unhook the bungee and adjust the red hook straight across from the chain guide. Unhook and reattach to the tightest position on one of the three gold chain links. It’s okay if the extra links are hanging loosely. Now, you’re ready to reattach your bungee.
How to Drive with Snow Chains on Your Tires
While driving with tire chains, listen for a loud sound of slapping, or metal on metal. If you hear any indication that a chain may be broken or hitting your car, STOP as soon as safely possible. Loose or broken chains that flap can wrap around a strut or shock component, causing big damage to your vehicle. To help prevent damage, here are a few tips for driving when you have winter chains installed on your vehicle.
- Don’t go over 25 miles per hour, or else you can damage the chains or your vehicle
- Never drive on bare pavement
- Avoid locking or spinning your wheels by starting or braking suddenly
Removing Snow Chains from Your Tires
Pull over in a safe location and remove the chains. Start by unhooking the bungee and chain from the guide, removing them from the tensioner. Unlatch the red hook, and then undo the blue and yellow cable connection. Once all of your chains are off and lying flat on the ground, pull backward or forward slowly a few feet so you can safely pick them up.
How to Pack and Store Snow Chains
At the end of your trip, lay your chains out in the garage and let them dry. If you pack them wet, they can rust.
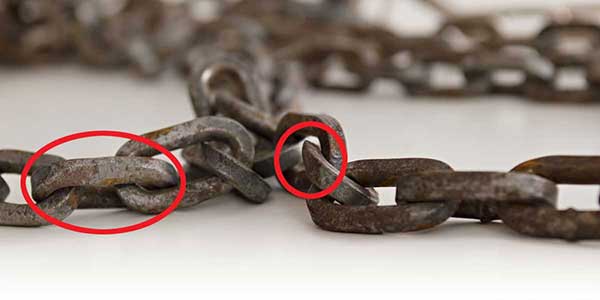
Also check them for wear, especially if you’ve driven them on asphalt for any distance. Look for flat spots, and replace the chains if you find some.
We’re Here to Help
Remember, if you don’t use your chains all winter long, you can return them with proof of purchase to any Les Schwab for a full refund in the spring.
Get your next set of Quick-Fit chains, along with a few tips on how to install them, at your local Les Schwab, where doing the right thing matters.
Want more tips on winter road safety? See 19 Winter Driving Resources You Can’t Do Without.
Get More Winter Tips
How to Install Tire Socks
Snow and ice-covered roads are a wintertime possibility throughout the west. That’s why it’s a good idea to carry traction devices wherever you go. As long as chains are listed as an option in your owner’s manual, quick-fit chains are likely the best choice for you. They can last for years and take you over the mountain and back again safely.
Tire sock traction devices are a new alternative to chains that work with low-clearance vehicles and are fast and easy to install.
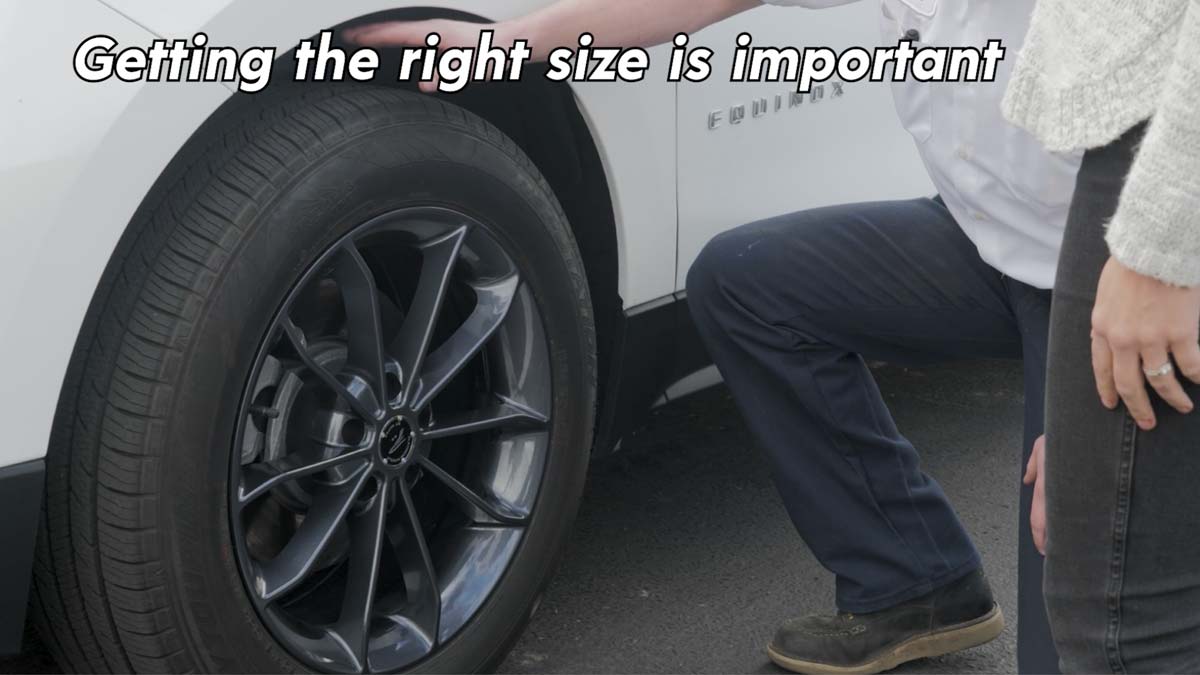
Make Sure to Purchase the Right Size
First, you’ll want to get the right set of tire socks for your vehicle at your local Les Schwab. Your size of tire socks depends on the size of your wheels and tires.
How to Install Tire Socks
When installing tire socks, put them on the driving wheels of your vehicle. If your car or truck is front-wheel drive, the socks go on the front. Rear-wheel drive? Put them on the back. If you have all-wheel drive or four-wheel drive, check your owner’s manual. Not sure? The experts at Les Schwab can help.
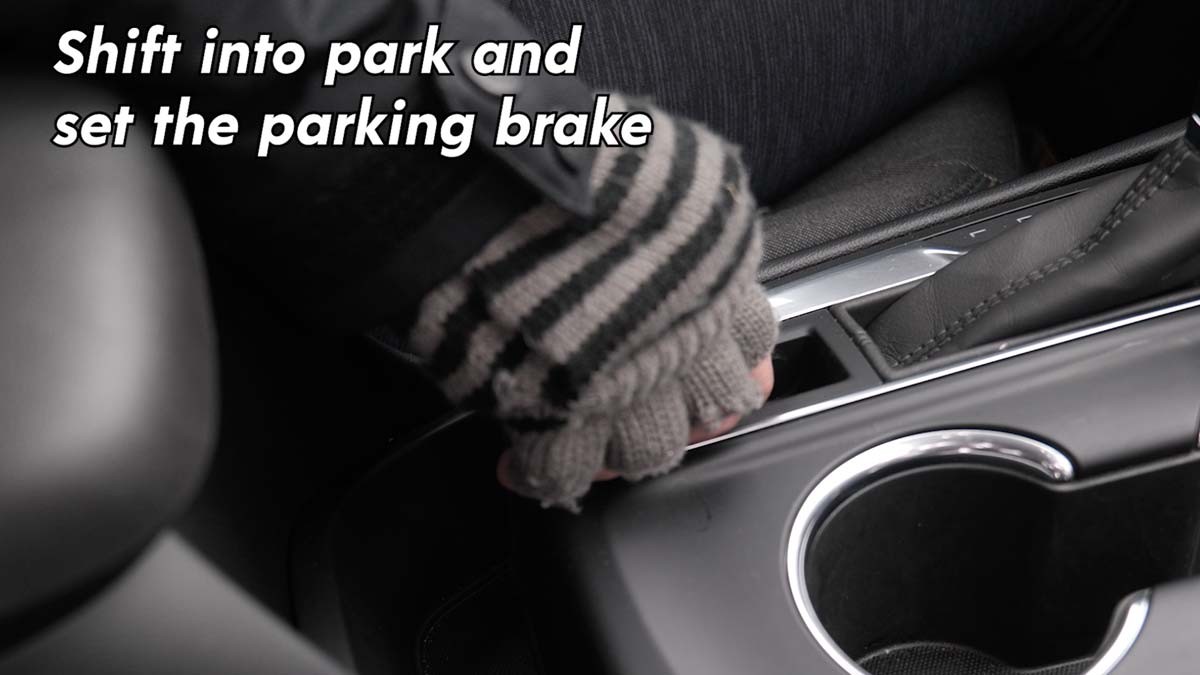
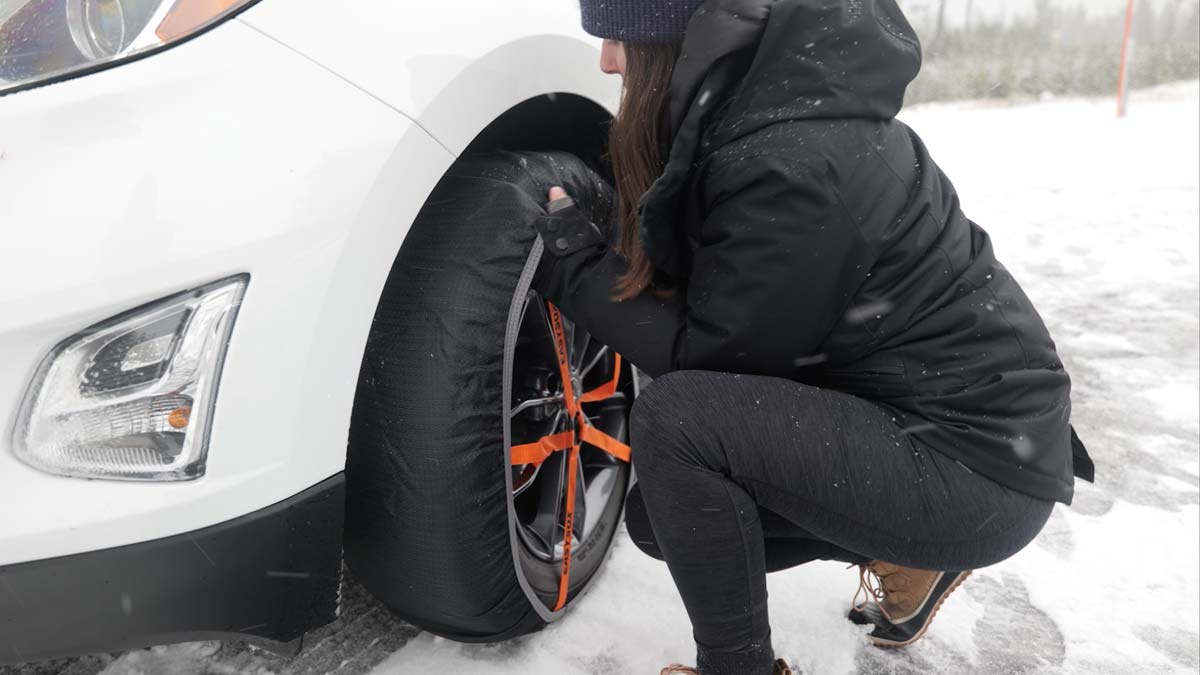
Put your vehicle in park and use the emergency brake for extra safety. Now, take everything out of your clean, tire sock bag.
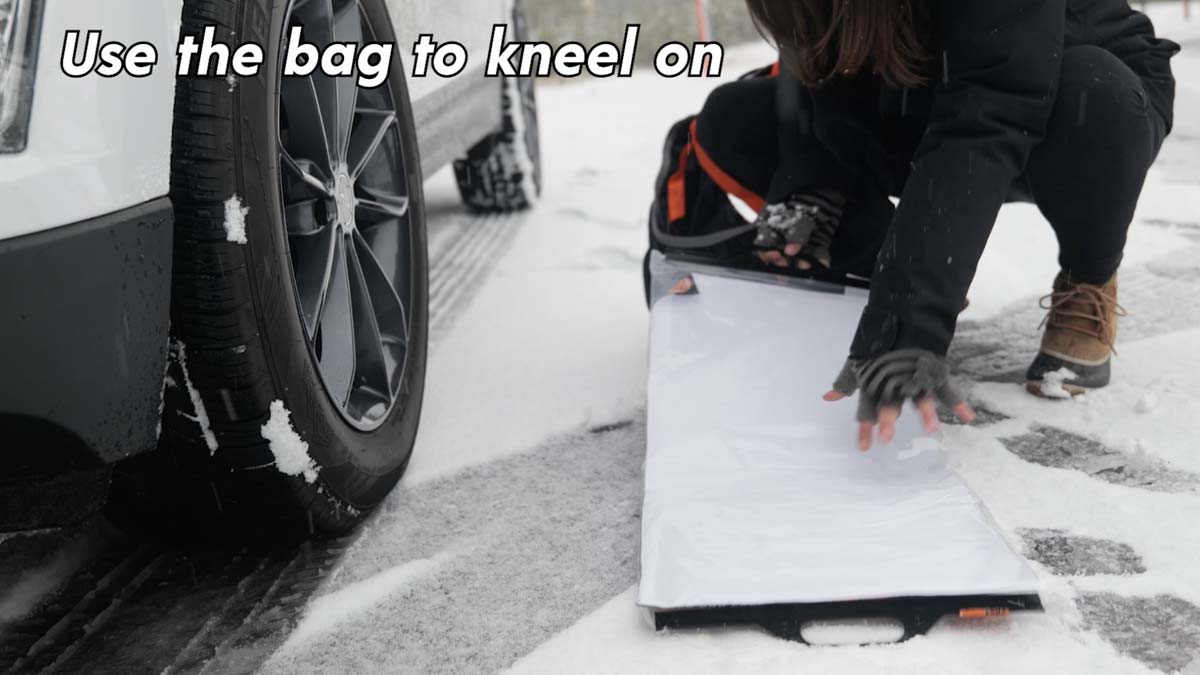
In it, you’ll likely find two tire socks, a set of instructions, and a pair of plastic, waterproof gloves to keep your hands dry in the snow. Lay the bag on the ground to keep your knees from getting wet.
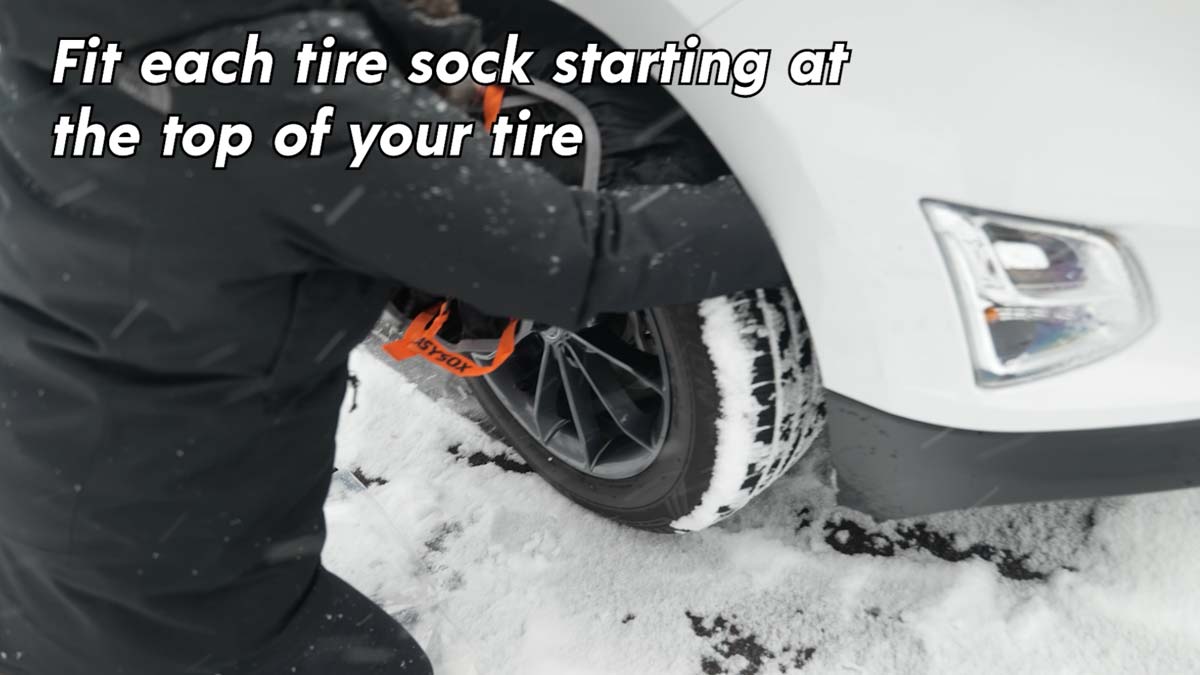
Fit each tire sock over your tire from the top to the bottom.
Move your vehicle forward a few feet. Put your vehicle in park and use the emergency brake again.
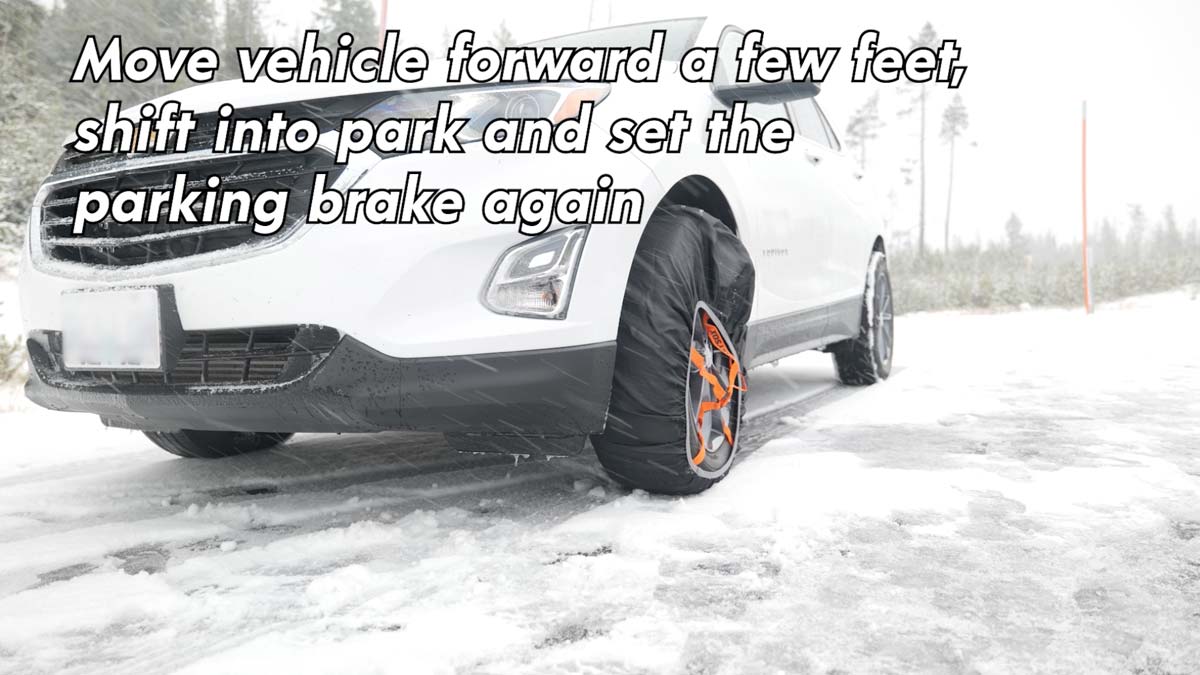
Then pull the remainder of your tire sock into position. Your tire socks will center themselves once you start driving.
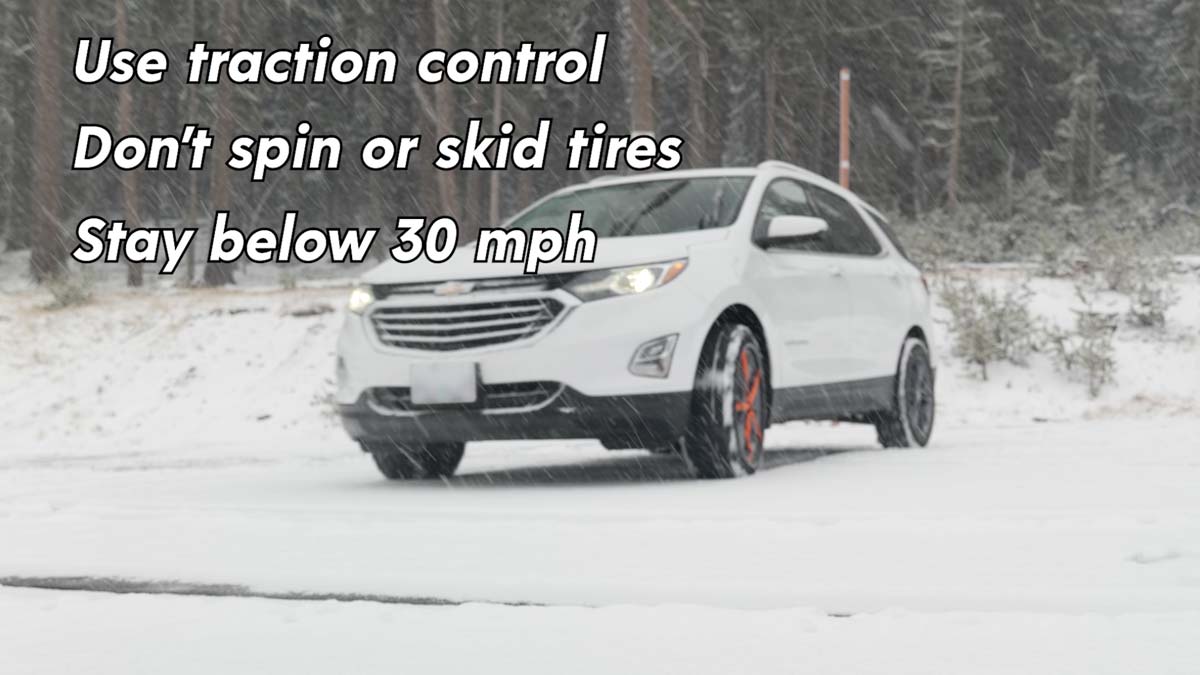
While you’re driving with tire socks installed, make sure to use your vehicle’s traction control (if available), avoid spinning your tires, and keep your speeds below 30 miles per hour.
How to Remove Tire Socks
Removal is just as easy. Pull them off the top of your tire, drive forward a few feet, and pull them off completely.
Help Your Tire Socks Last Longer
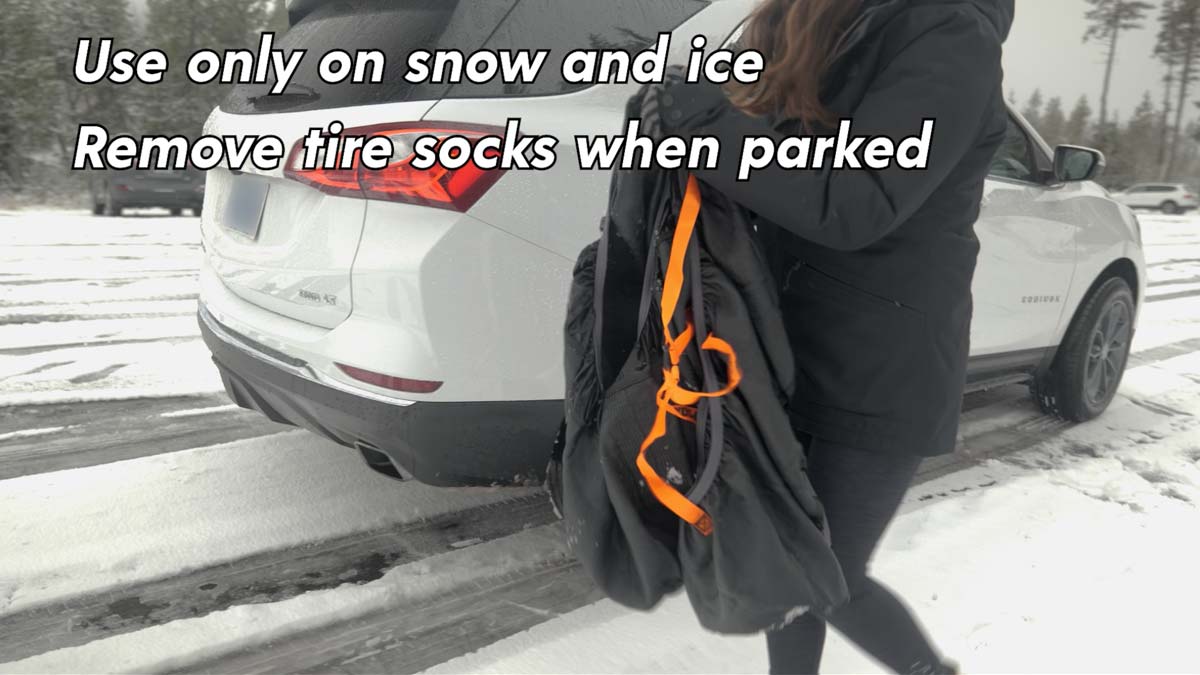
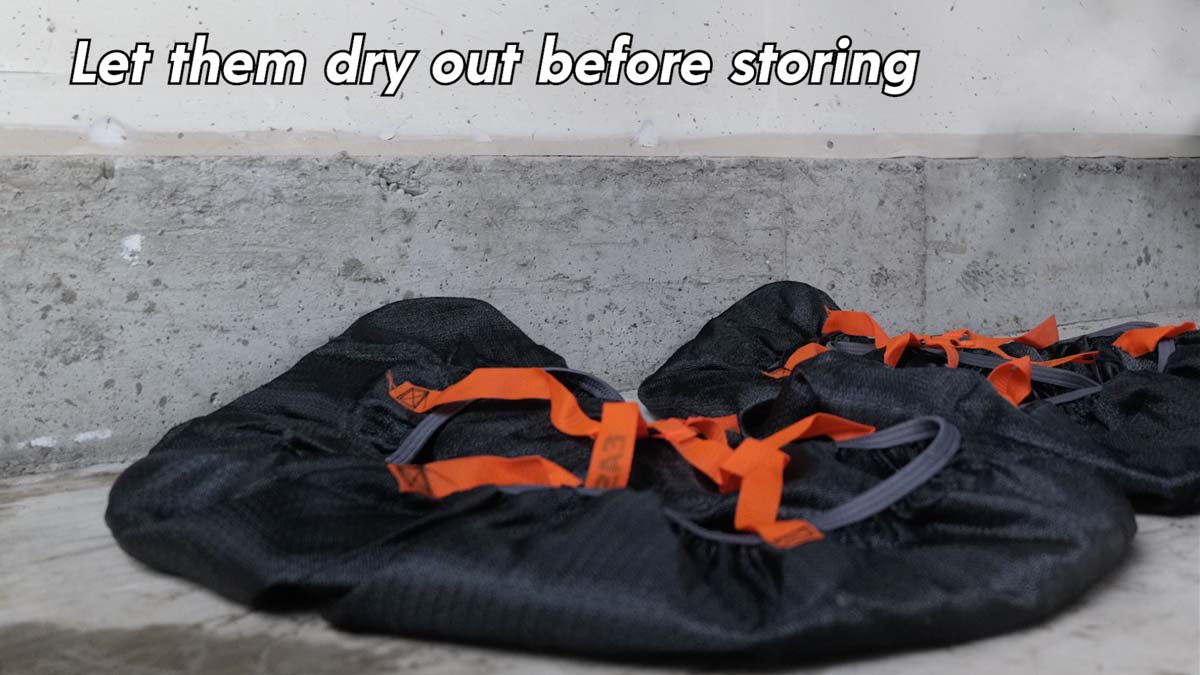
When used only on snow and ice, tire socks can be reused over and over. Just don’t drive on bare or wet pavement with them on. That’ll wear them out fast. And don’t leave them on while you’re parked. Over time, they can freeze in place and make it difficult for you to get moving again.
After you’re done using your tire socks, give them time to dry before storing them.
Tires Socks Come with Our Return Guarantee
Remember, if your tire socks are unused at the end of winter, you can return them to any Les Schwab for a full refund in the spring.
Les Schwab is Your Winter Traction Headquarters
Be ready for anything the weather throws your way. Get a set of tire sock traction devices along with a few tips on how to install them, at Les Schwab. Want more tips on winter road safety? See 19 Winter Driving Resources You Can’t Do Without.
Get More Winter Tips
9 Driving Safety Tips to Get You Ready for a Winter Drive
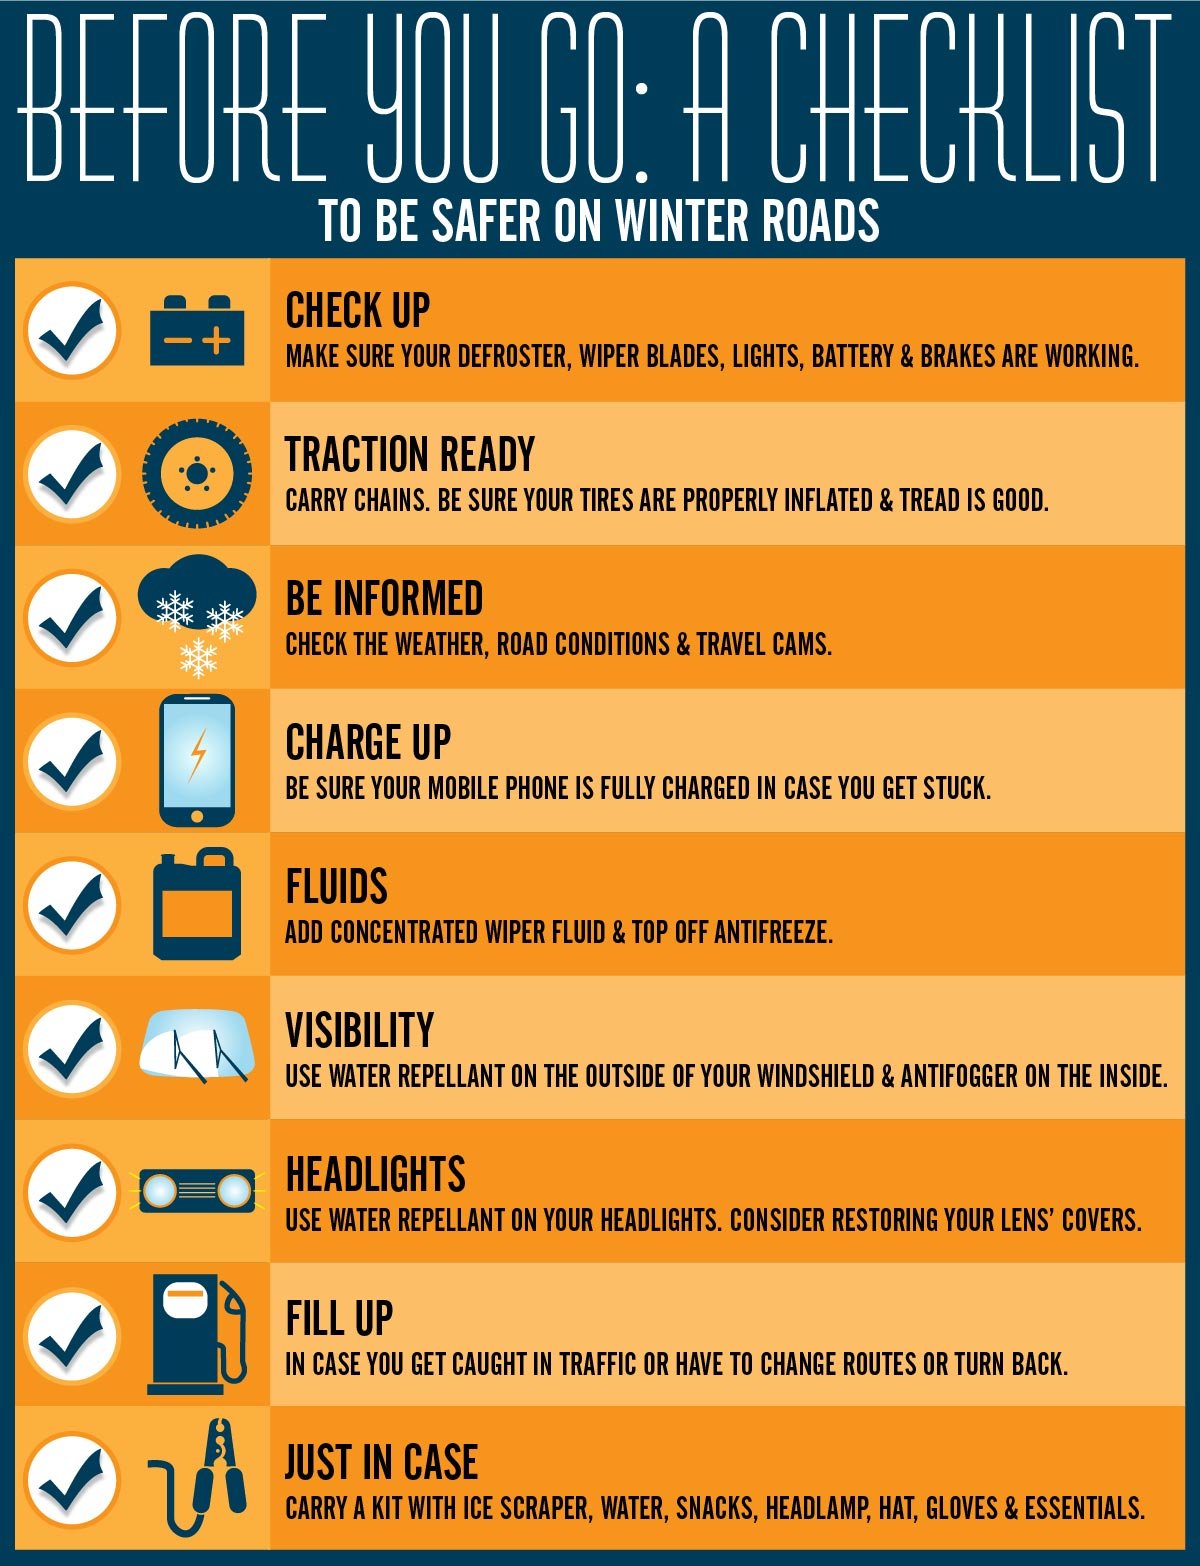
It’s never fun to be stuck on the side of the road, but in snow, ice or bitter cold, it can be downright miserable. Before you head out on a long drive or road trip in the winter, do these nine things.
- Check that your defroster, wiper blades, lights, battery, and brakes are working well. If any of them are due for service, now’s the time to get it done.
- Be ready to add traction: Carry snow chains. Check your tire pressure and tread depth, too.
- Know what you’re getting into. Find out about the weather along your route and get road condition updates.
- Charge up. Keep your mobile phone’s battery charged in case you are stranded and need to call for help.
- Fill your fluids. Add wiper fluid that includes de-icer. If you know how to do it safely, check your antifreeze, or have a mechanic do it for you.
- Cold air temps, wet conditions and dirty road spray make for foggy, blurry windshields. Use antifogger on the inside of your windshield and water repellent on the outside.
- Also use water repellant on your headlights. If your lens covers are scratched, consider restoring or replacing them as winter sets in.
- Keep the gas tank full in case you get lost, stuck in traffic or rerouted due to an accident.
- Carry a winter road trip safety kit that includes an ice scraper, a headlamp, warm accessories, snacks and other essentials just in case.
Now that your vehicle is ready, review ways to drive safely in our Stay Safe on the Road This Winter infographic.
Shop for Winter Tires
19 Winter Driving Resources You Can’t Do Without
Introduction
Winter driving in the West can be wacky at best and perilous at worst. Roads ice over. Rain makes pavement slick as bacon grease. Here are 19 winter driving resources on everything from fog lights to snow chains to driving on ice. Use these in addition to the warnings, notices or other advice specific to your vehicle in your owner’s manual.
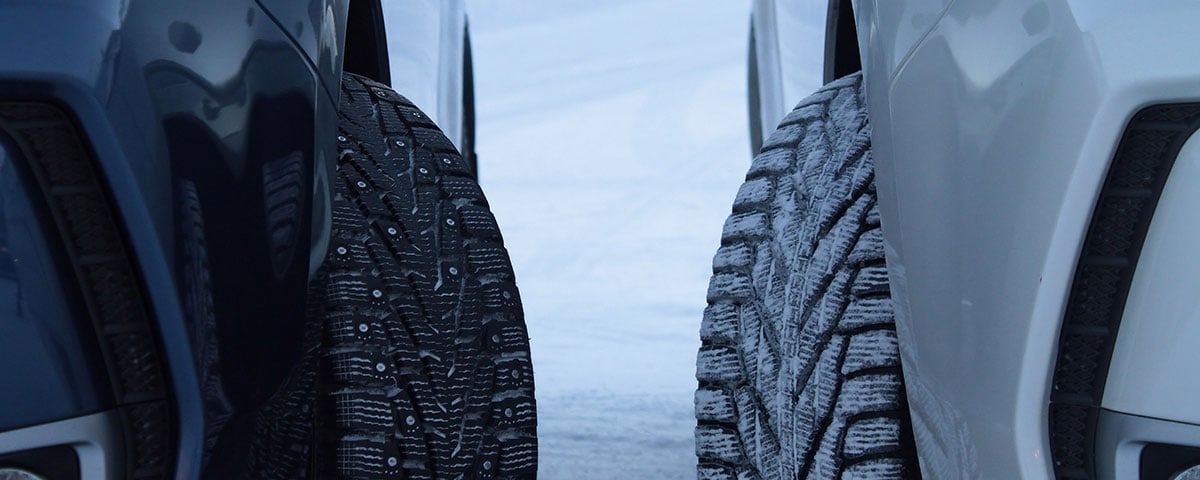
Got Traction? Winter Tires & Snow Chains
Don’t think of chains as a substitute for winter tires but as an option you need to have ready when you’re driving on snow.
You shouldn’t go on a winter drive without being sure of your traction. Find out how to use snow chains, the differences between all-season and winter tires and what you really need for where you live.
- How to: Put on Snow Chains. Step-by-step instructions and a video for putting on snow chains and driving safely.
- Snow Chains Buyer’s Guide. The Automobile Association’s guide to what you need and how to buy them.
- How to Choose Snow Tires. Are winter tires worth it? Can you just buy chains instead? Should you buy studded tires?
Top Safety Reminders for Winter Road Trips
Don’t use cruise control. Your tires may spin too fast on slick roads, causing you to lose control.
Getting road-ready is different in the cold months. Don’t leave home without reading these short refreshers to prevent winter driving nightmares.

- 14 Items to Put in Your Winter Road Trip Safety Kit. Think you’re prepared? Here’s a checklist of what you may have forgotten.
- AAA’s guide How to Go on Ice and Snow. Easy-to-read info on safer driving in winter.
- 9 Driving Safety Tips to Get You Ready for a Winter Drive. A pre-trip checklist to get your vehicle winter-ready and quick tips on how to drive on slick roads.
- What to Do If You Get Stuck in Snow. Tips on getting your vehicle out of deep snow from an Icelandic off-road driving expert.
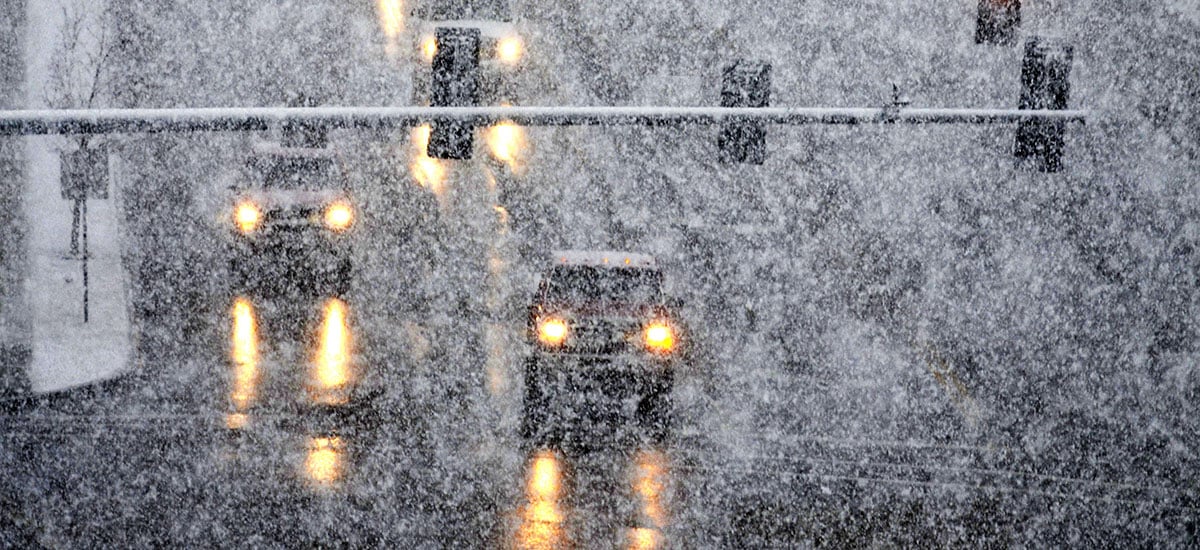
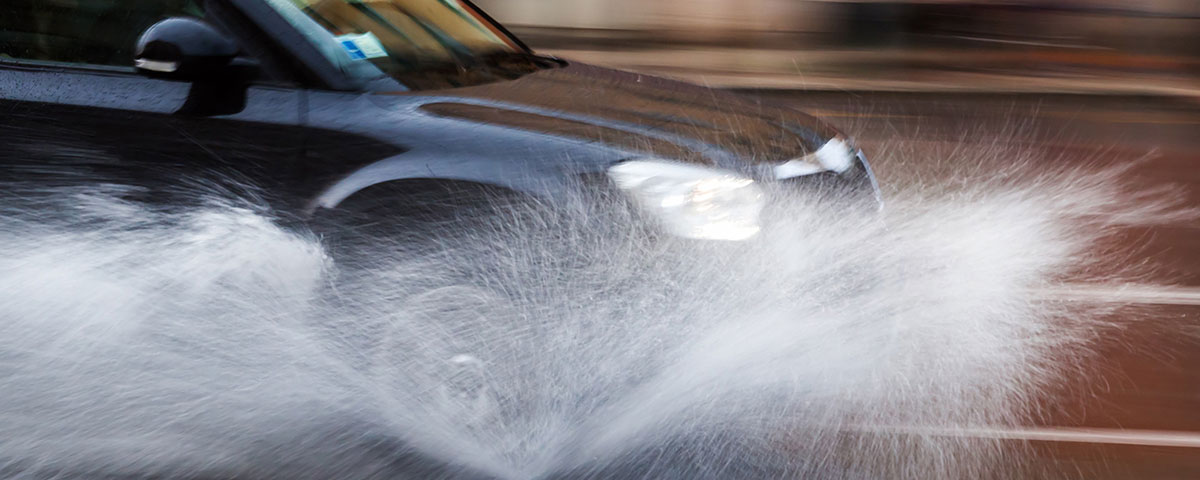
How to Drive in Rain, Snow, Ice and Fog
For a car traveling 35 mph on dry pavement, it can take anywhere from 60 to 97 feet for thinking and braking distance. Double that for driving on wet pavement, triple it for packed snow and 10 times it for icy roads.
Tips for handling all the bad driving conditions you're likely to face from the Pacific Northwest to the Rockies to Southern California and every place in between.
- Driving in Rain? How to Avoid Hydroplaning and Other Tips. When you’re most at risk of hydroplaning, preventing skids and what to do if you do lose control.
- Winter Driving Tips: How to Drive in Snow. What you should know about stopping distance, driving downhill and where the road’s going to be most dangerous.
- How to Drive Safely on Ice: Top Tips for Keeping Your Car on the Road. You can’t always tell when the road is icing up. Here’s when to use extra caution and steer clear of a wreck.
- How to Recover from 5 Types of Skids. For advanced drivers only, the low-down on different types of skids and how to safely steer when it happens.
- How Do I Drive Safely in Fog? How to drive safely in fog and a list of fog light rules for Western states.
- Common Winter Driving Myths Busted. Thinking you should gear down in slippery conditions? Think again.
- Winter Driving Guide. The difference between traction control and stability control.
Winterizing Your Vehicle
If it’s worked hard over summer, or the weather was really hot, your auto battery could have trouble holding a charge and delivering cranking power come fall.
Summer driving puts a lot of wear and tear on your vehicle. Here’s what you can do in fall to head off dead batteries and other hassles.
- Now Seasonal Car Battery Care: Why and How. Figure out if you need a new auto battery or not, before your car won’t start.
- How to Winterize a Car. A cold-weather survival guide for your car from Consumer Reports.
Real-time Road Conditions
Know in advance or in real time what’s happening with the weather and roads where you’re headed. Here’s where to find out.
- What You Need to Know About Road Conditions Right Now. Real-time road conditions in Western states, with chain requirements, current road reports, forecasts, road cams and winter storm warnings.
- AccuWeather Hyperlocal Weather App. An app for Apple or Android phones that gives hyperlocal, minute-by-minute precipitation forecasts.
- Weather Underground App. For use in rural areas, an app for Apple or Android phones with local data from over 40,000 professional and hobbyist weather stations.
If Nothing Else, Remember This About Winter Driving
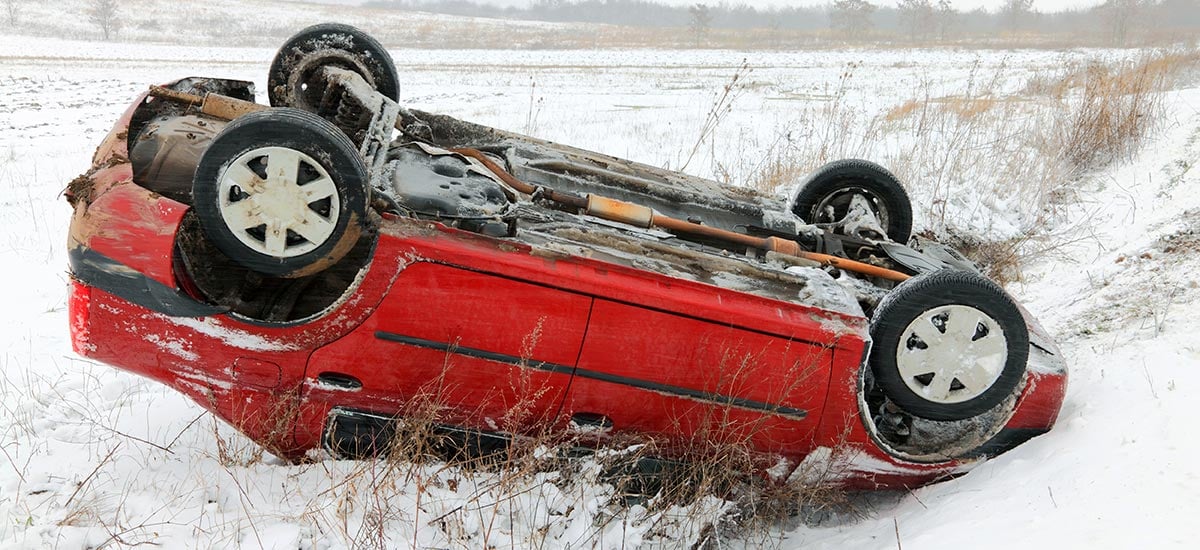
When you’re in a hurry to get to work or your vacation rental it can be easy to forget that winter driving is not like warm-weather driving. In winter, bald tires, tailgating, leaving home on a near-empty tank or passing aggressively have even bigger consequences.
Almost a quarter of auto crashes in the U.S. annually – nearly 1,259,000 — are weather-related. Almost half of those happen during rainfall.
It’s better not to venture out at all when the weather’s awful. But if you absolutely have to be on the road, here are key things to remember.
Slowing down is more likely to get you there safely and on time than rushing. Statistics show you can expect bad weather on main roads to result in travel time delays from 11 to 50 percent. On arteries with traffic signals, you can expect speed reductions from 10 to 25 percent on wet pavement and from 30 to 40 percent with snowy or slushy pavement.
Why fight it?
Give yourself more stopping distance. Forget the 3-second rule; allow at least 120 feet on wet pavement, 180 feet on packed snow and 600 feet on ice to stop.
Make sure all parts of your vehicle are winter-ready — starting with the right tires, properly inflated and in good condition.
SHOP WINTER TIRES14 Items to Put in Your Winter Road Trip Safety Kit
If you’re going over the hills, through the woods or over a mountain pass during wintry months, do yourself a favor. Put a winter road trip kit in your vehicle, just in case.
Icy roads and traffic jams in cold weather aren’t predictable. Preparing in advance may save you some misery...and keep you safer in bad driving conditions.
Here Are Items to Put in a Winter Road Trip Safety Kit to Keep in Your Vehicle During the Cold Months.
- Plastic storage tub for keeping it all together and dry. And easy stowing when warmer weather returns.
- Headlamp. It could be not only snowing but dark when you realize you’re going to have to put on the snow chains.
- Speaking of tire chains, don’t forget them. If you have several sets of chains for several vehicles, putting the right chains in a dedicated winter safety kit for each car will keep you from being stranded with the wrong chains when you need them. (Here’s a video on how to install chains.)
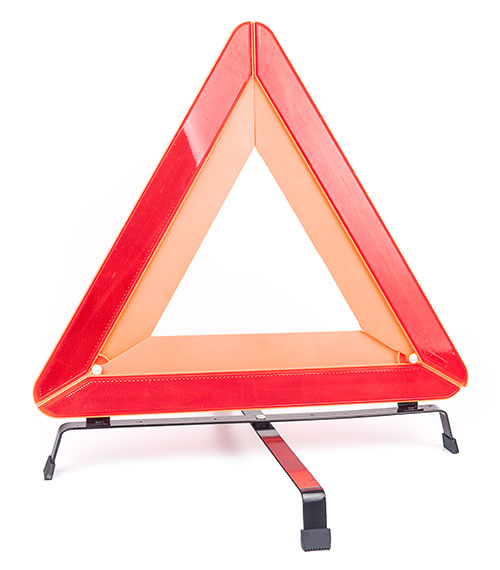
- Reflective gear. A fluorescent safety vest with reflective strips can be bought at most big box home improvement stores. Orange warning triangles are available at most auto parts stores.
- Windshield ice scraper, in case of freezing rain, sleet or heavy snow.
- Waterproof jacket with a hood and rainpants. You’ll be glad to have that hood to keep snow from going down your back if you need to put on chains.
- Something to sit or kneel on when installing chains. Snowy or icy pavement is not a comfortable surface. A small tarp or even a piece of cardboard will really help.
- Gloves. Mittens won’t do you much good if you’re installing snow chains. Get gloves that are water resistant.
- Beanie or baseball cap. A knit hat that covers your ears will keep your head warm. Or a cap with a bill will keep snow from hitting your face.
- A towel to use after snow chain installation and removal, to put on the seat to keep it dry from your wet outer layers.
- Water. If there’s an accident on the pass you could be idled for hours. It’s a good idea to carry some water.
- Snacks. Keep a few energy or protein bars with a long shelf life in your kit.
- Kid items. Long road delays+hungry kids = nightmare. An extra diaper, a deck of cards and bag of snacks won’t take up much room and could make things a lot more tolerable.
- Pet items. A foldable fabric water bowl, spare leash and treats will be rewarded with lots of wags.
And one last thing: keep waterproof shoes handy inside your vehicle. Driving to your destination with wet feet in winter is no fun. Bring along the galoshes, just in case.
Want more tips on winter road safety? See 19 Winter Driving Resources You Can’t Do Without.
Did you know you can get a free pre-trip safety check for your vehicle at Les Schwab? Find out more here.